 |
| The 350Z is on the lift, the silicone gasket material is setting up, and I'm on the couch for lunch! |
We last left the 350Z in the middle of a brake caliper rebuild, with the knowledge that replacing the oil pan was coming up, as well as some suspension work. A new task we added was for the Cool Shirt cooler installation too, but since that isn't required to drive the car, we'll do that later, as long as it gets installed before driving in Alabama in another month.
In the "Good News/Bad News" department, the good part is that the oil pan replacement is very easy and straightforward, as in: drain fluid-remove pan-install new pan-add new fluid-DONE! The bad part on a 350Z is all the parts you have to take off the car FIRST just to GET TO the oil pan. With our 2 choices being to either remove the engine, or to suspend the engine, we went with suspending the engine before the mandatory "remove the sub-frame just to get to the oil pan" work. Here we go, BUCKLE UP!
 |
| Thanks to Adam Powlas for the use of his garage, lift, tools, and knowledge. He's another 350Z driver too. |
 |
| We removed the hood and the tower brace so that we could install the upper engine support. |
 |
| The red engine support uses two chains around the motor mounts below to support the engine. That allows us to raise the car and remove the subframe from underneath. Thanks to Brian Nixon for buying this new tool (at a place that rhymes with HARBOR FREIGHT) so that we didn't have to just pull the engine out! |
 |
| Since we're going to remove the oil pan, let's drain the oil. |
 |
| Here we've removed the sway bar and sub-frame so that we can now remove the lower oil pan (black) and the upper oil pan (aluminum.) Also loosened to get it out of the way is the steering rack. You could just remove it, but then you'd want to drain the power steering fluid too. |
 |
| The lower black oil pan is gone, which means next you can get to the bolts to remove the upper pan, because some of the bolts holding it in are up INSIDE the oil pan. I didn't design this, so don't blame me! |
 |
| A couple of cool things here. You can see the oil pickup tube hanging down, and above that is a cover under the crankshaft. If you looked real close you could see around that cover and see some of the crankshaft assembly. |
 |
| The upper oil pan now needs new gasket silicone for installation. |
 |
| Lower oil pan awaiting gasket silicone. |
 |
| Brian grabs the caulk gun and gets into action! |
 |
We let the silicone set for an hour before installing the pan back on the car. For some of us, this step is known as "lunch time."
|
 |
| Looks like the upper pan is in place, and on the right you can see an engine mount, with the chain wrapped above it going up to the support. |
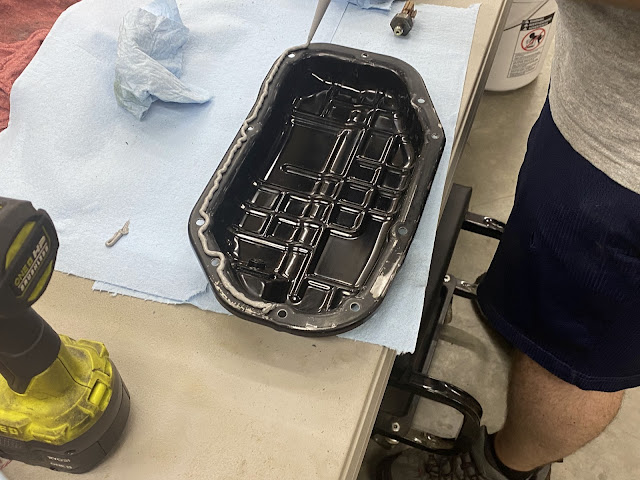 |
| Lower pan gets the gasket treatment. |
 |
| Both pans installed, bolts loosely attached, and then will be torqued when the silicone is set. |
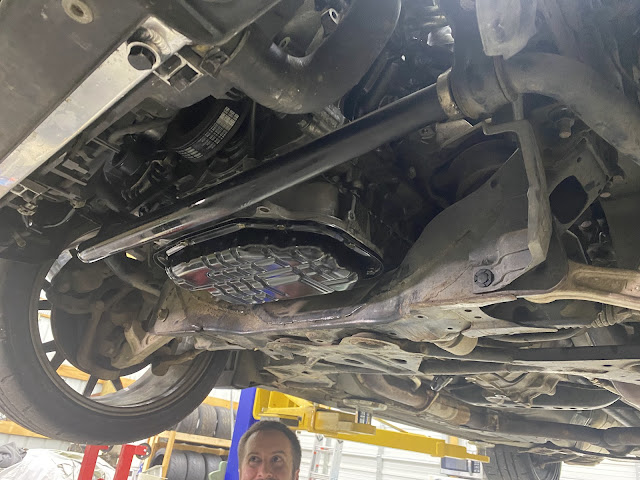 |
| Sub assembly back in place and we're getting nearly done. |
Brian reports that the next day they filled the car with oil and things were all good. Stay tuned for more fun filled race car adventures on the blog. Thanks for reading.


No comments:
Post a Comment
Note: Only a member of this blog may post a comment.